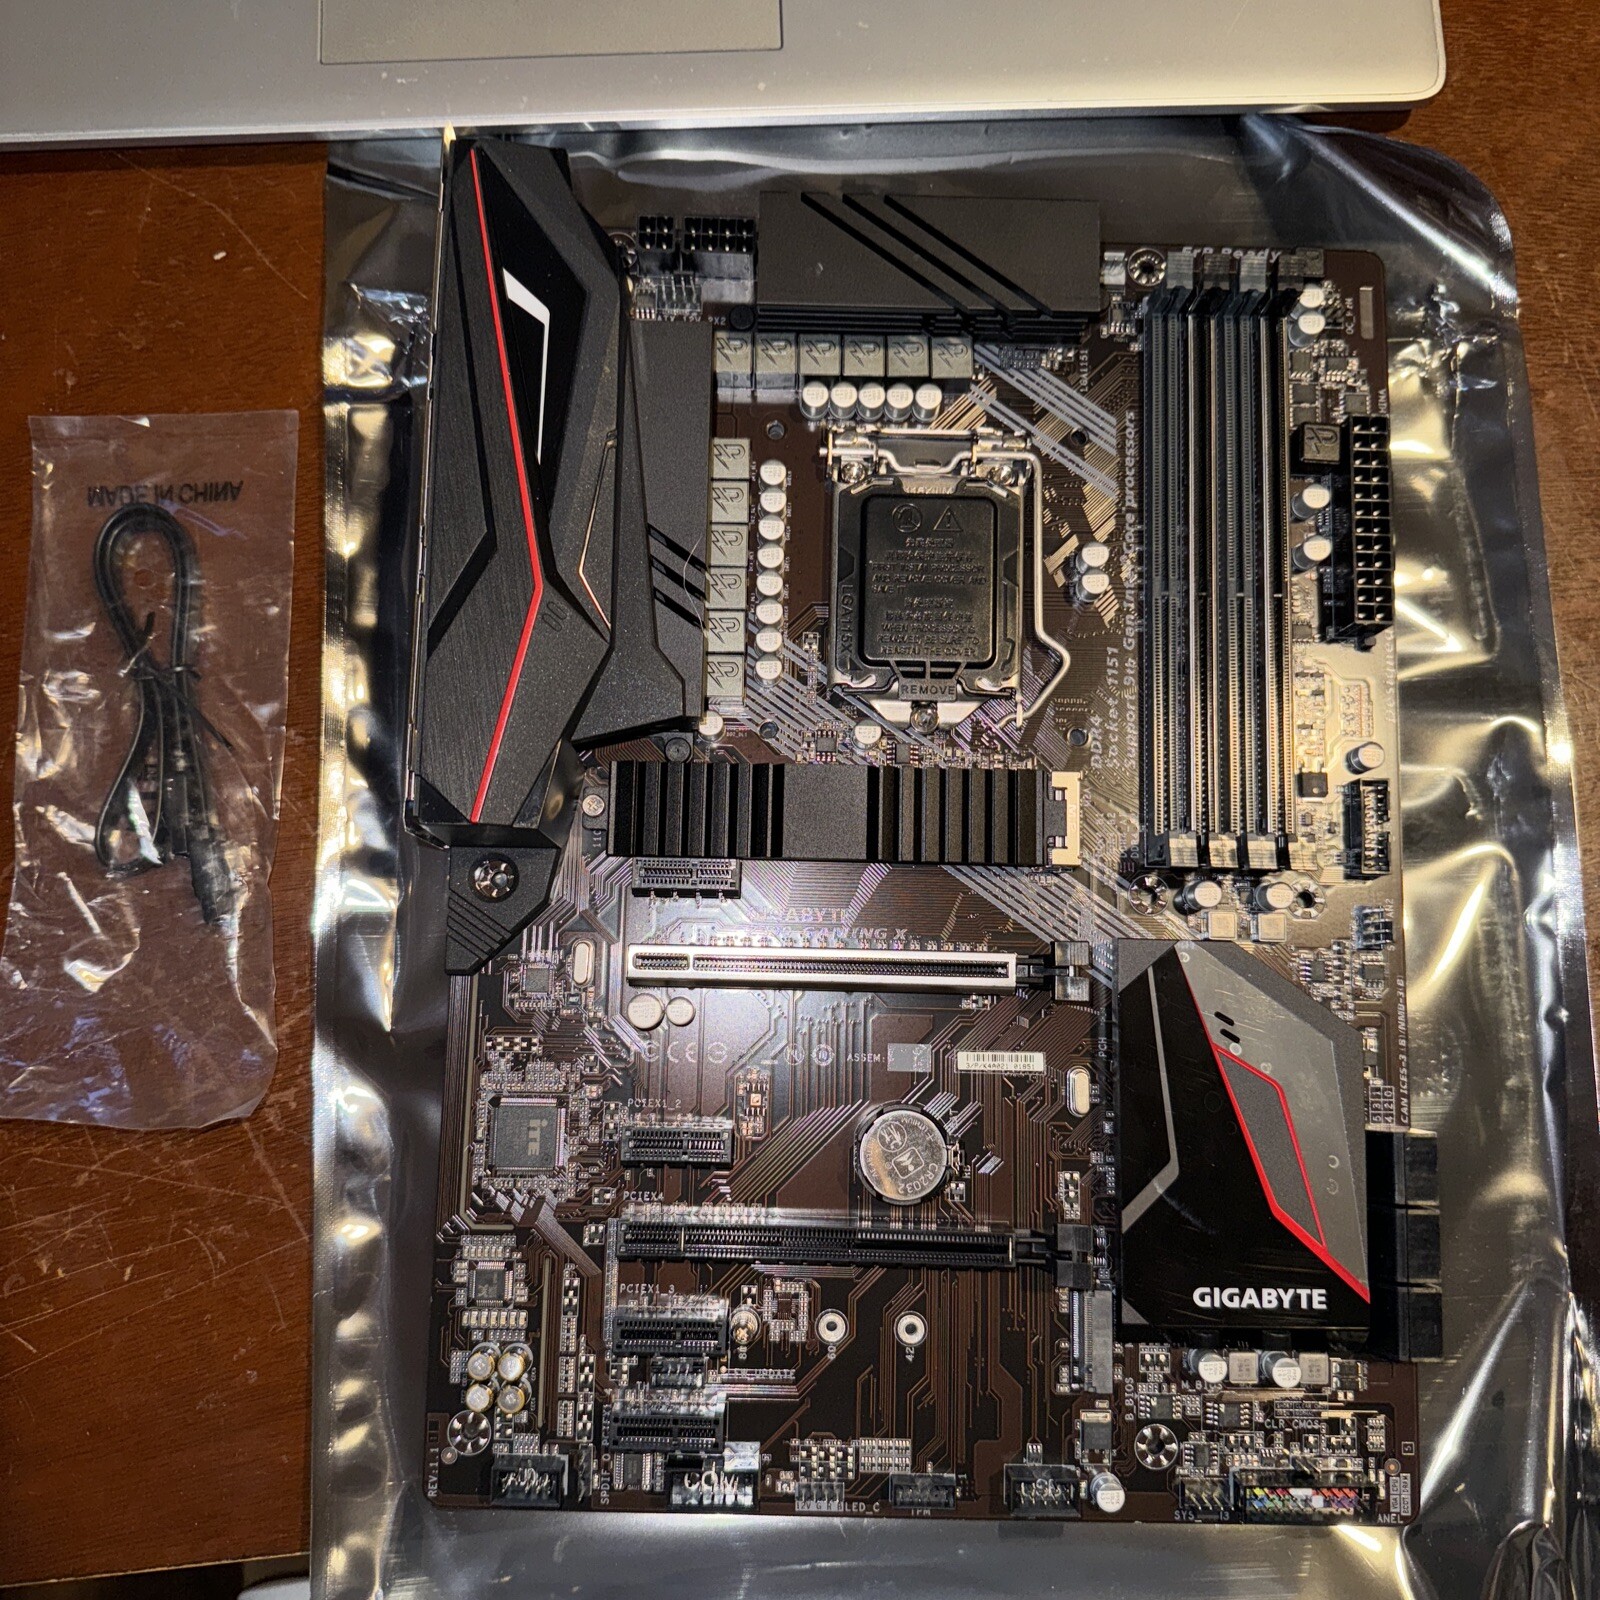
GIGABYTE Z390 GAMING X Motherboard Intel 9th Gen DDR4 LGA 1151 ATX w/ IO Shield For Sale
When you click on links to various merchants on this site and make a purchase, this can result in this site earning a commission. Affiliate programs and affiliations include, but are not limited to, the eBay Partner Network.

GIGABYTE Z390 GAMING X Motherboard Intel 9th Gen DDR4 LGA 1151 ATX w/ IO Shield:
$94.99
Before installing the CPU, please carefully check for bent CPU pins. Bent pins are a common cause of no-POST or dead motherboards, and many users are unaware the damage occurred. Insert the CPU gently to avoid damage.No original box, never used, great condition
The original M.2 heatsink might be missing, an after market heat sink will be provided if the original one is missing.
With come with a Sata cable
It supports 8th and 9th gen Intel cpu but might needs an bios update to support the 9th gen
Step-by-step trouble shoot if the board won't boot:
Before troubleshooting, please check whether any CPU pins are bent. Pins can sometimes bend during CPU installation and cause the system not to boot.1) Basic power checks
Make sure the power supply switch (on the PSU) is ON and the power cable is fully seated.
Confirm the wall outlet or power strip works (try another device or a different outlet).
Ensure the 24-pin ATX and 8/4-pin CPU power connectors are firmly plugged into the motherboard.
Remove all non-essential components: extra drives, extra PCIe cards, RGB hubs, USB devices.
Leave only: CPU (with cooler), 1 RAM stick in the slot recommended by the motherboard manual, power supply, and monitor (if needed).
Try to power on. If it boots, add one component at a time to find the faulty part.
Reseat RAM: remove sticks and firmly reseat them until the latches click.
Try one RAM stick at a time in the primary slot (usually labeled DIMM_A2 check your manual).
If one stick fails but another works, the failing stick may be bad or incompatible.
Turn off and unplug.
Locate the CMOS jumper (or remove the coin-cell battery) and follow the manual instructions to clear CMOS usually move the jumper for a few seconds or remove the battery for ~30 seconds.
Reinstall battery/jumper and try to boot.
This resets BIOS settings (useful if an overclock or wrong settings are stopping boot).
Double-check the CPU is seated properly and the cooler is installed (loose cooler can prevent proper contact).
Inspect the CPU socket for bent pins (carefully, with good light).
Reinstall the CPU only if you're comfortable doing so ------ otherwise advise the buyer to seek local tech help.
If your CPU has onboard video, remove the discrete GPU and display from the motherboard's video outputs to rule out GPU issues.
Confirm the monitor and cable work (try another cable/monitor if available).
Many boards have Q-LEDs, POST LEDs, or a debug code display. Note which LED lights (CPU, DRAM, VGA, BOOT) or any beep codes and share them with the seller.
If the board has a speaker header, attaching a small speaker will give beep codes that help diagnosis.
If possible, test with another known-good PSU. Some no boot issues are caused by weak or failing PSUs that can power fans but not boot the system.
If the board is an older BIOS and you have a new CPU, it may require a BIOS update. BIOS updates carry some risk; do not attempt unless you are comfortable or have a compatible CPU available. Contact the seller if you suspect this.
When contacting the seller, include:
Order number and motherboard model.
Photos: full board, CPU socket area, power connectors attached.
Which troubleshooting steps you already tried (especially whether one-stick RAM or CMOS clear worked or not).
CPU/RAM model used (helps diagnose compatibility issue).
Do not attempt advanced repairs (e.g., micro-soldering) if you're not experienced.
If the board is DOA after following these steps, open a return request and include the items above this helps speed up your replacement/refund.
Related Items:
GIGABYTE Z390 GAMING X Motherboard Intel 9th Gen DDR4 LGA 1151 ATX w/ IO Shield
$94.99
(Factory Refurbished) GIGABYTE Z390 AORUS ELITE LGA 1151 Intel ATX Motherboard
$179.99
NEW ASUS Prime Z390-A LGA 1151 Intel Z390 SATA 6Gb/s ATX Intel Motherboard
$158.94

Documentation
- AIX Local Security Checks
- Backdoors
- CentOS Local Security Checks
- CGI abuses
- CISCO
- Databases
- Debian Local Security Checks
- Default Unix Accounts
- Denial of Service
- Fedora Local Security Checks
- Finger abuses
- Firewalls
- FreeBSD Local Security Checks